
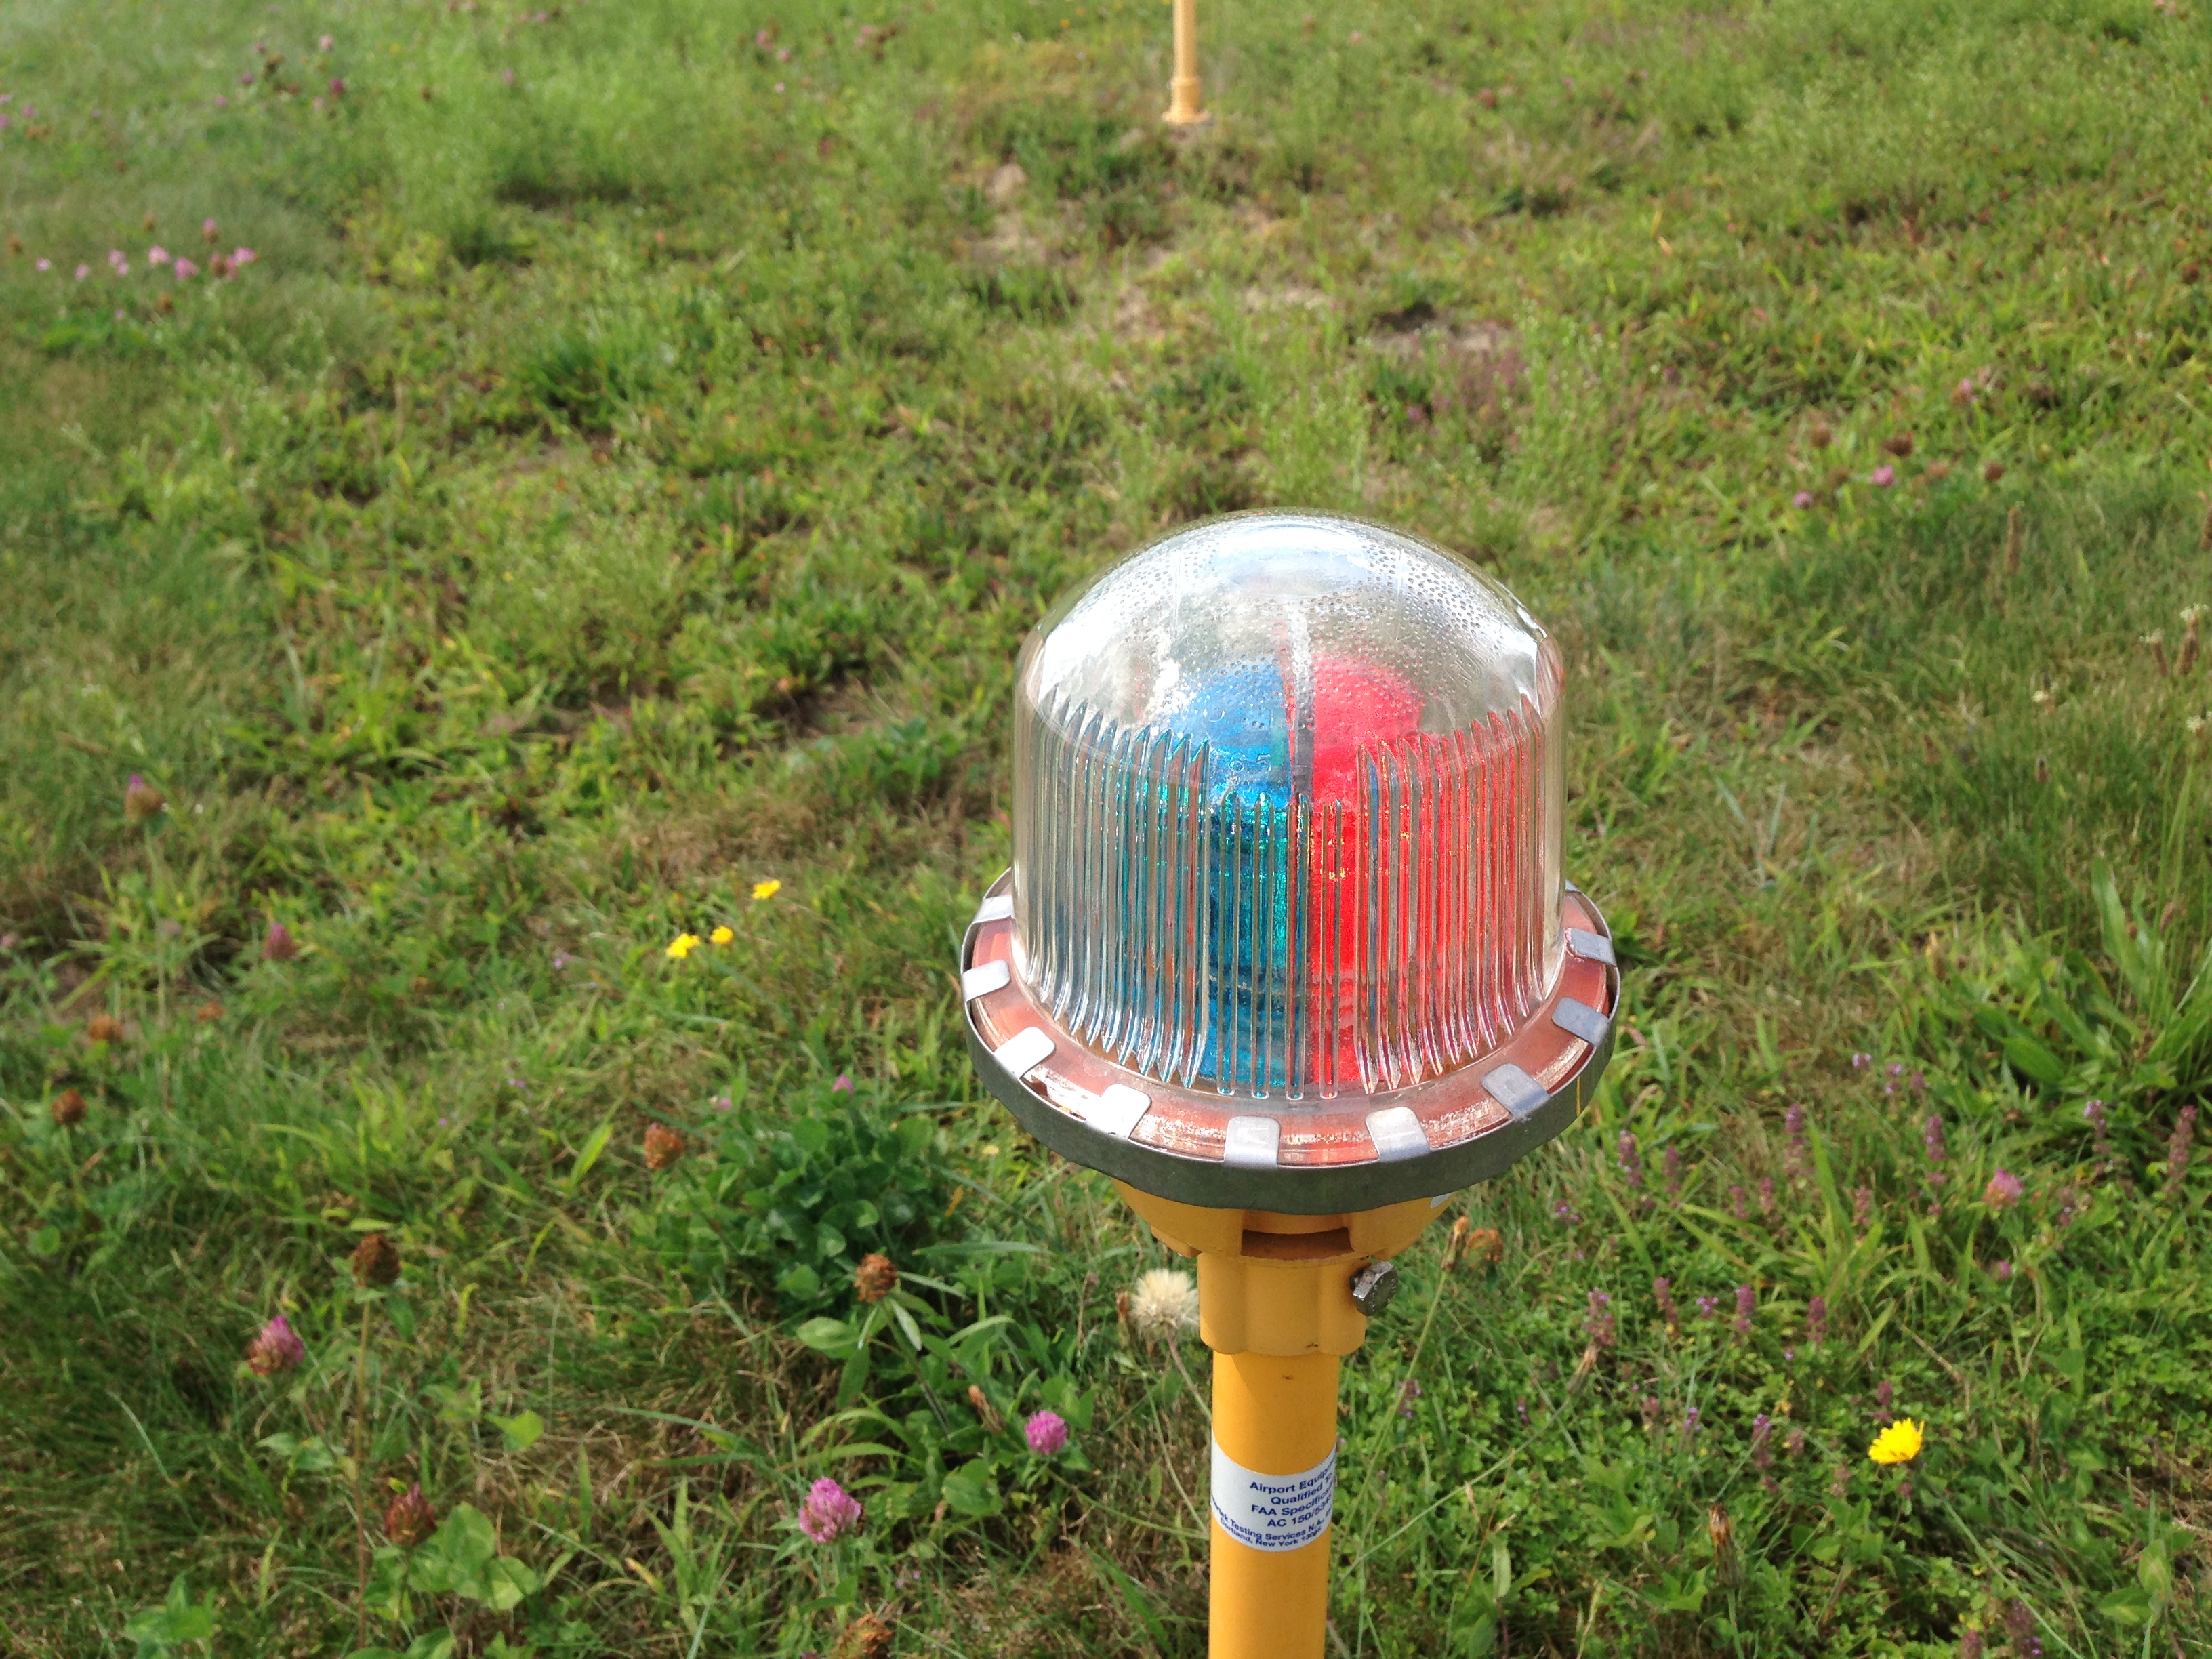
A split threshold light, under a clear layer…
There is more than meets the eye when it comes to airfield edge lighting… There are a variety of edge lights around airports, most are common and easy to understand, but a lot of times this is something pilots memorize and never really take the time to notice… There are a couple of combinations that may even surprise the most seasoned pilot. Let’s take a look at airport edge lighting… All edge lights are omni-directional in that they shine every direction, though in some cases they are “blacked out” on half of the globe. The globe is the portion that covers the bulb as airports use incandescent or LED bulbs all of which are regular white lights. There are a couple of different designs, one is a single dome (like the taxiway light shown below) which protects the bulb and adds the necessary color. The other common design features a clear dome that covers an inner done which adds the proper color to the edge light.
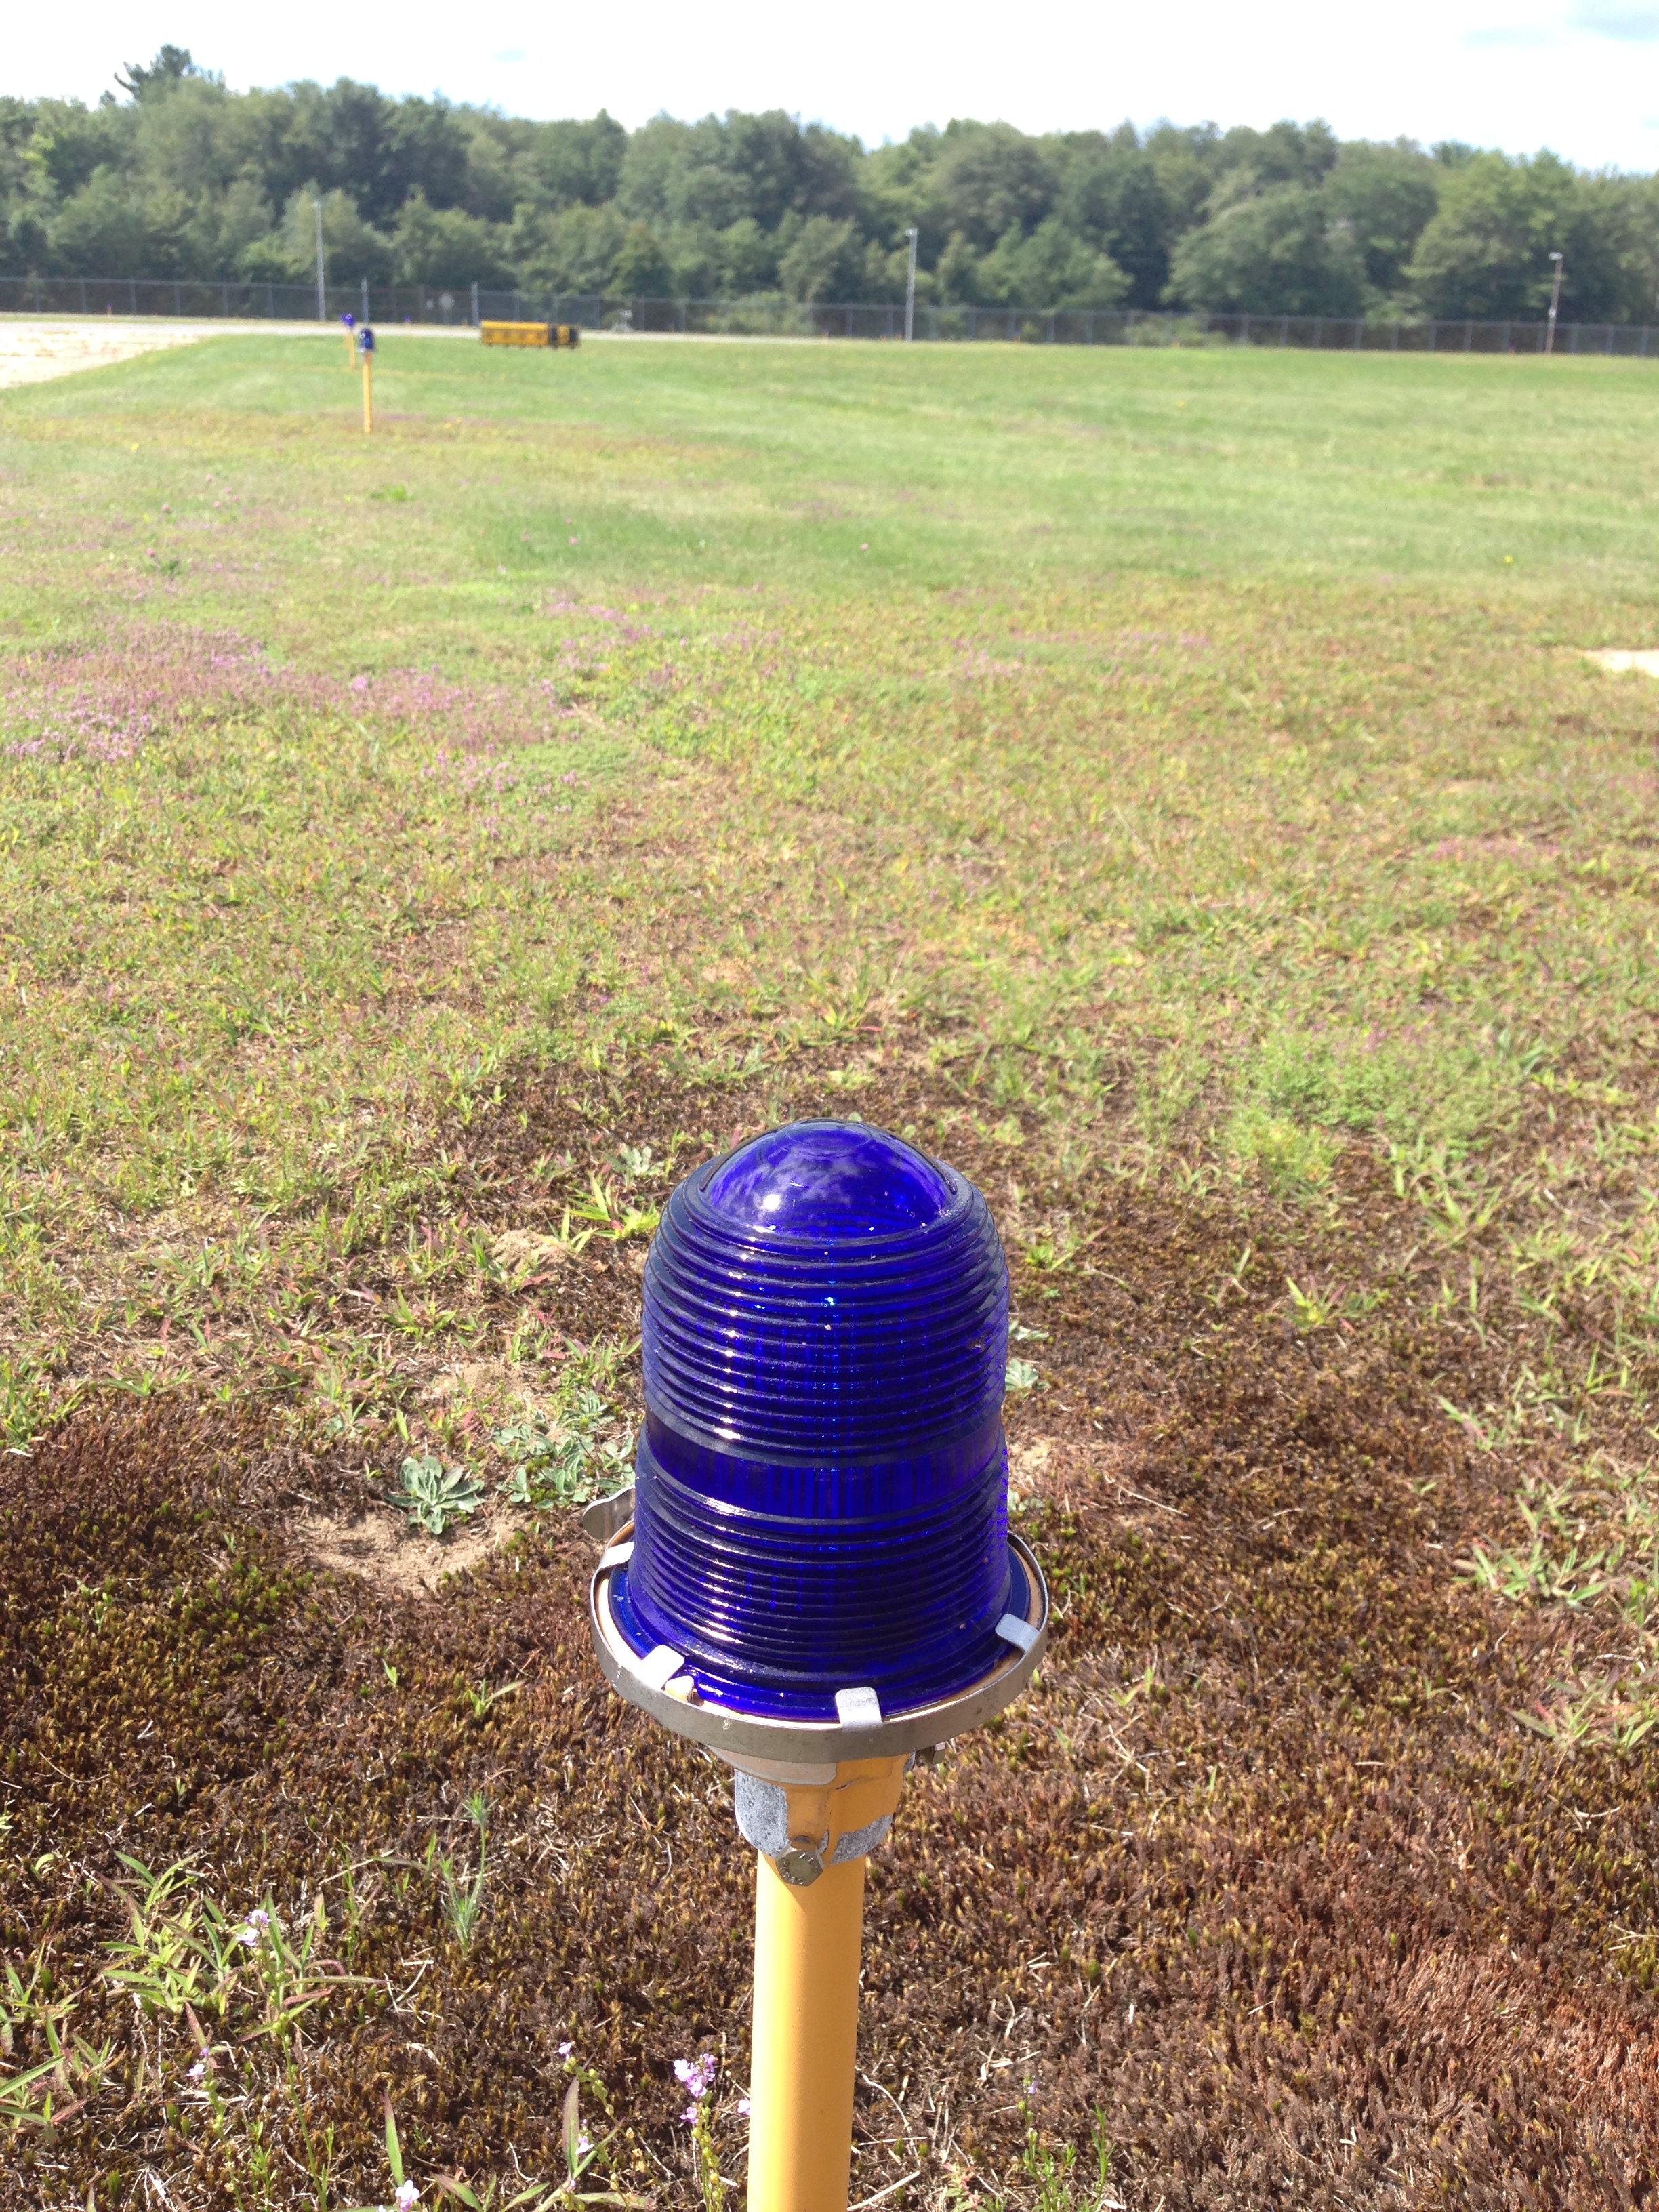
A taxiway light, always, all blue!
We’ll start with the easy ones….
Taxiway edge lights are as simple as it gets, anytime there is a taxiway edge light it will be blue, always! These are one of the lights that don’t vary in any way…
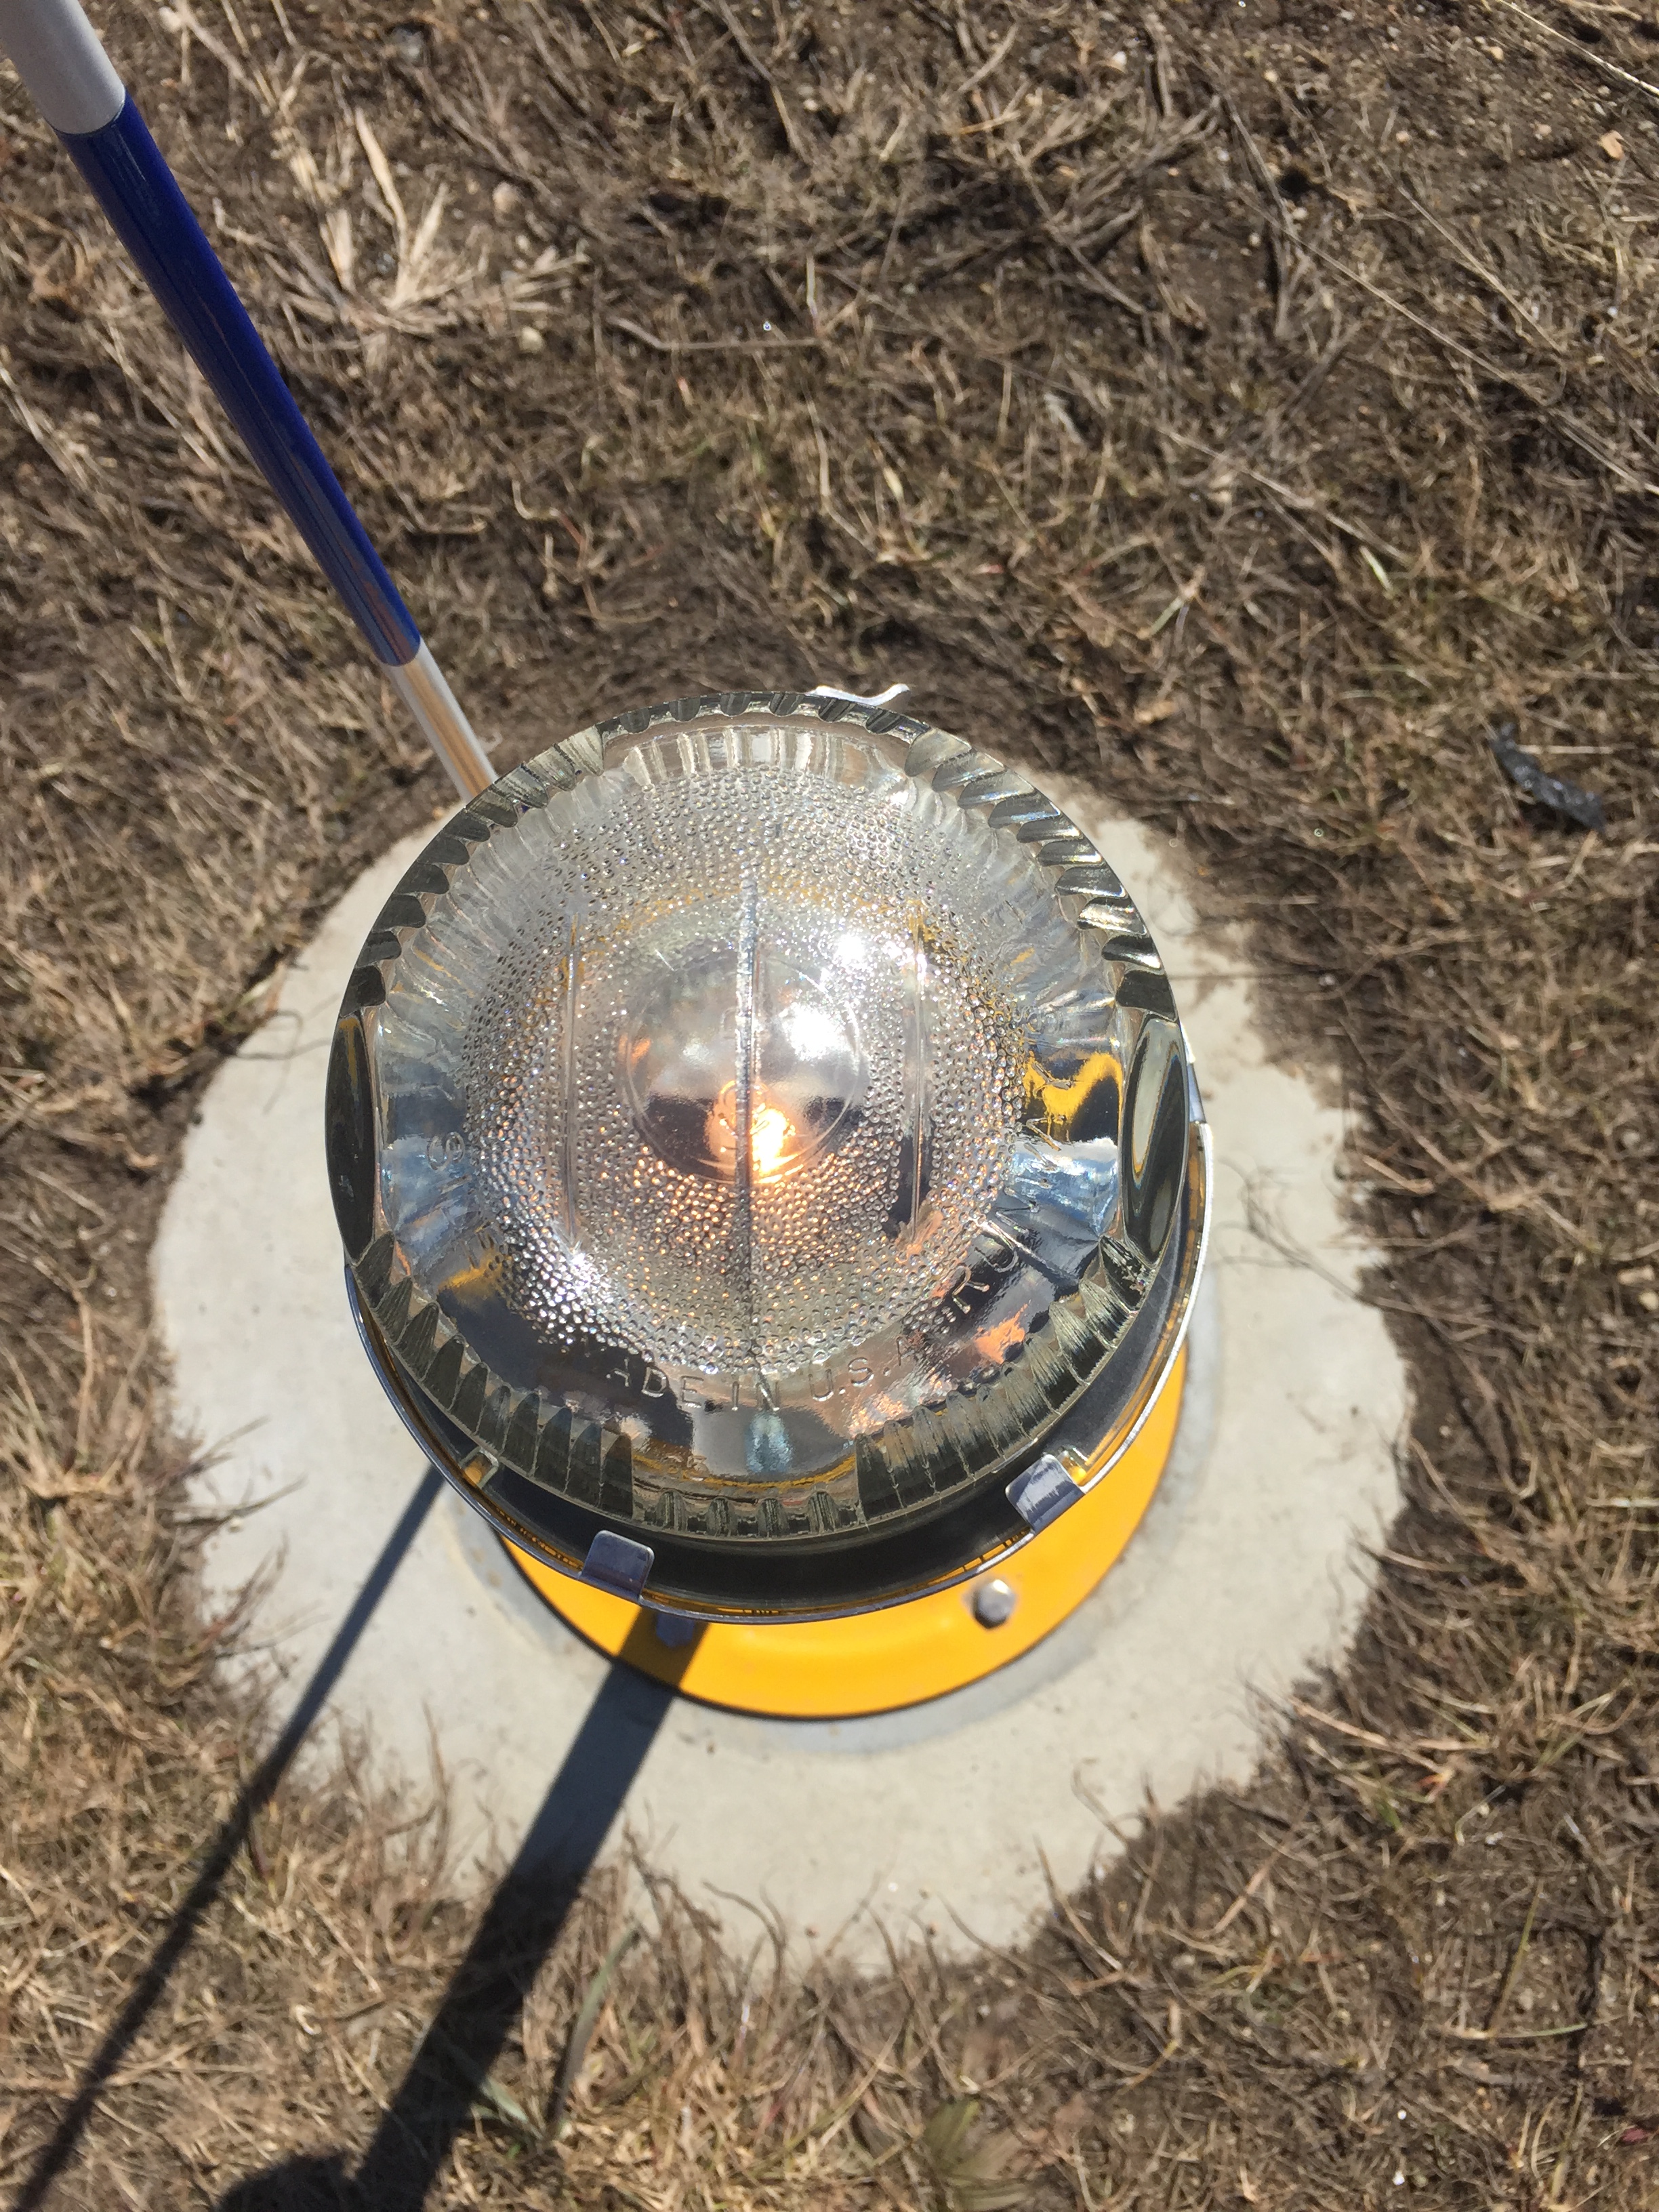
An all-white runway edge light. When you think about it, on a runway that is 5,000′ in length and served by instrument approaches on either end will really only have a few runway lights that are “all-white”… 4,000′ of the 5,000′ will feature split light domes to accommodate for the amber lights necessary to illustrate the final 2,000′.
Runway edge lights start to get a little more complicated… The majority of runway lights are white omni-direcitonal lights. In a simple form, white lights mean runway and blue lights mean taxiway… But it isn’t that simple.
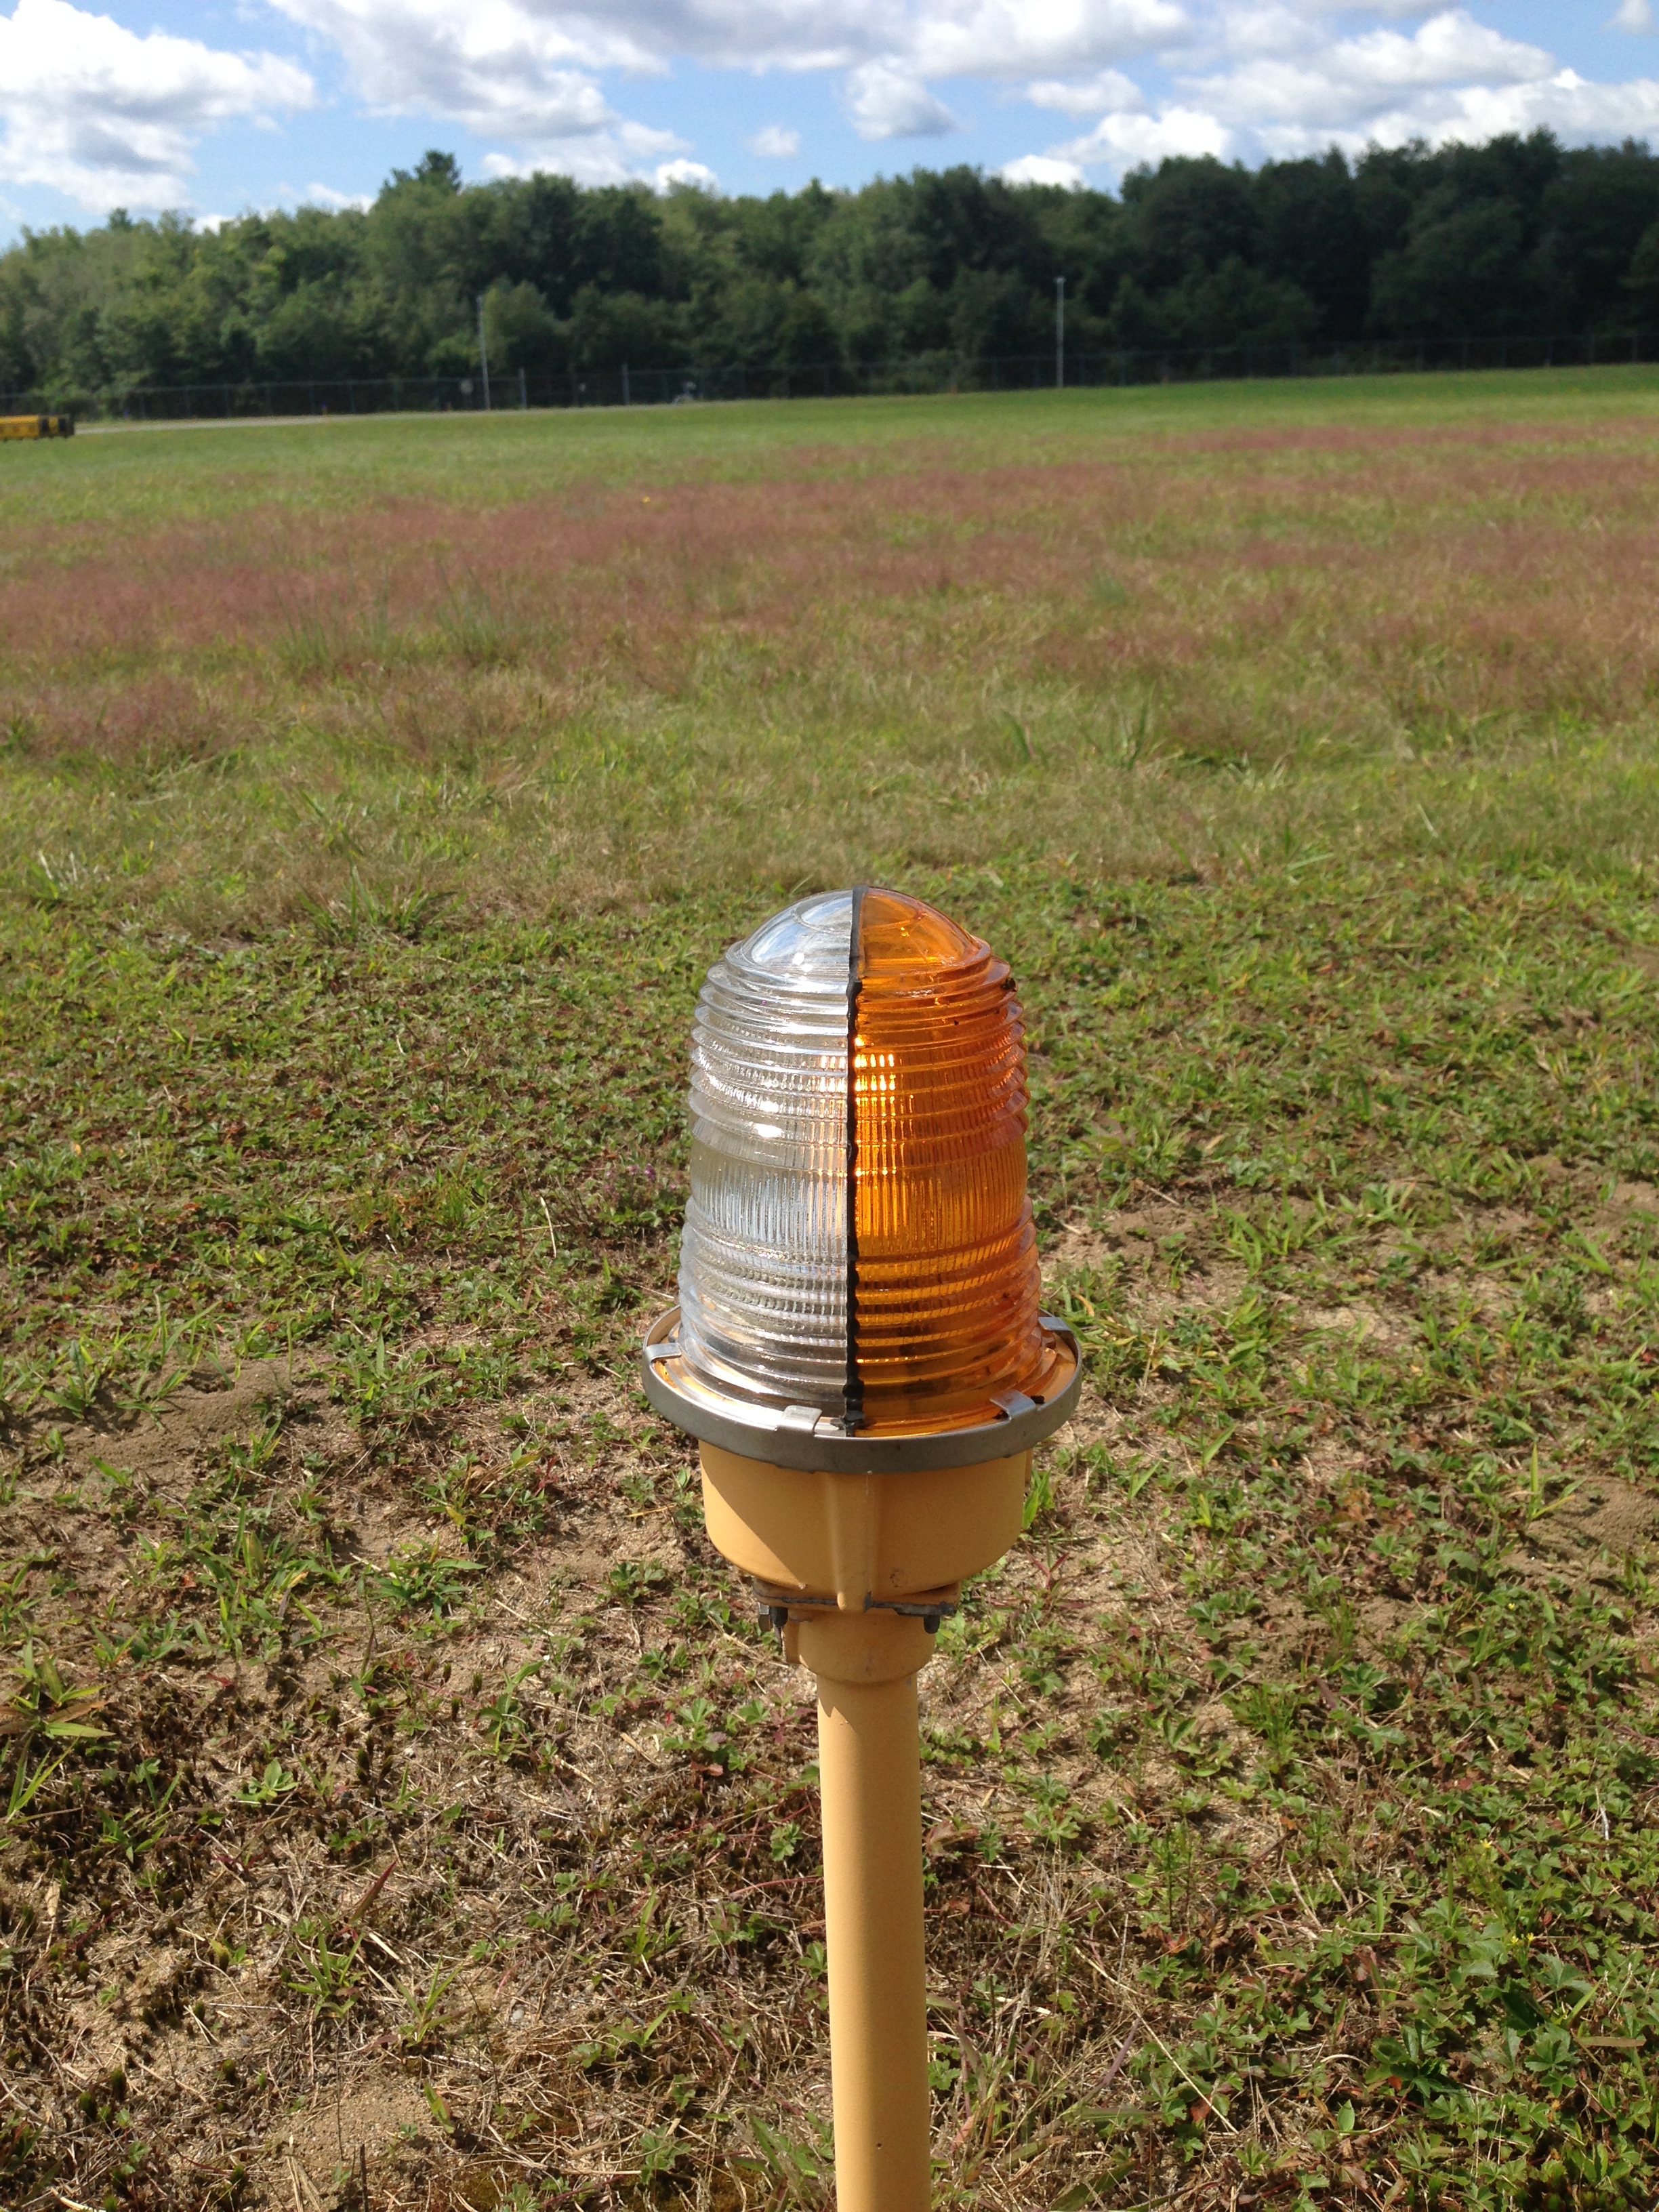
A split white-amber globe.
On runways with an instrument approach the last 2,000 feet of half of the runway, which ever is less will feature amber lights. This means that the runway lights actually have a split globe on them, so that from one direction the light is white and on the other side the light is amber. This can be done with a split outer or inner globe over the bulb.
For a pilot approaching a runway, the threshold or the delineation of the area where a landing can be made is highlighted by four lights on either side of the runway with green globes. For runways where the very beginning of the approach end of the runway is available for use there lights will be just before the end of the runway and will be aligned so that the outer most light is in line with the runway edge lights that extend down the length of the runway.
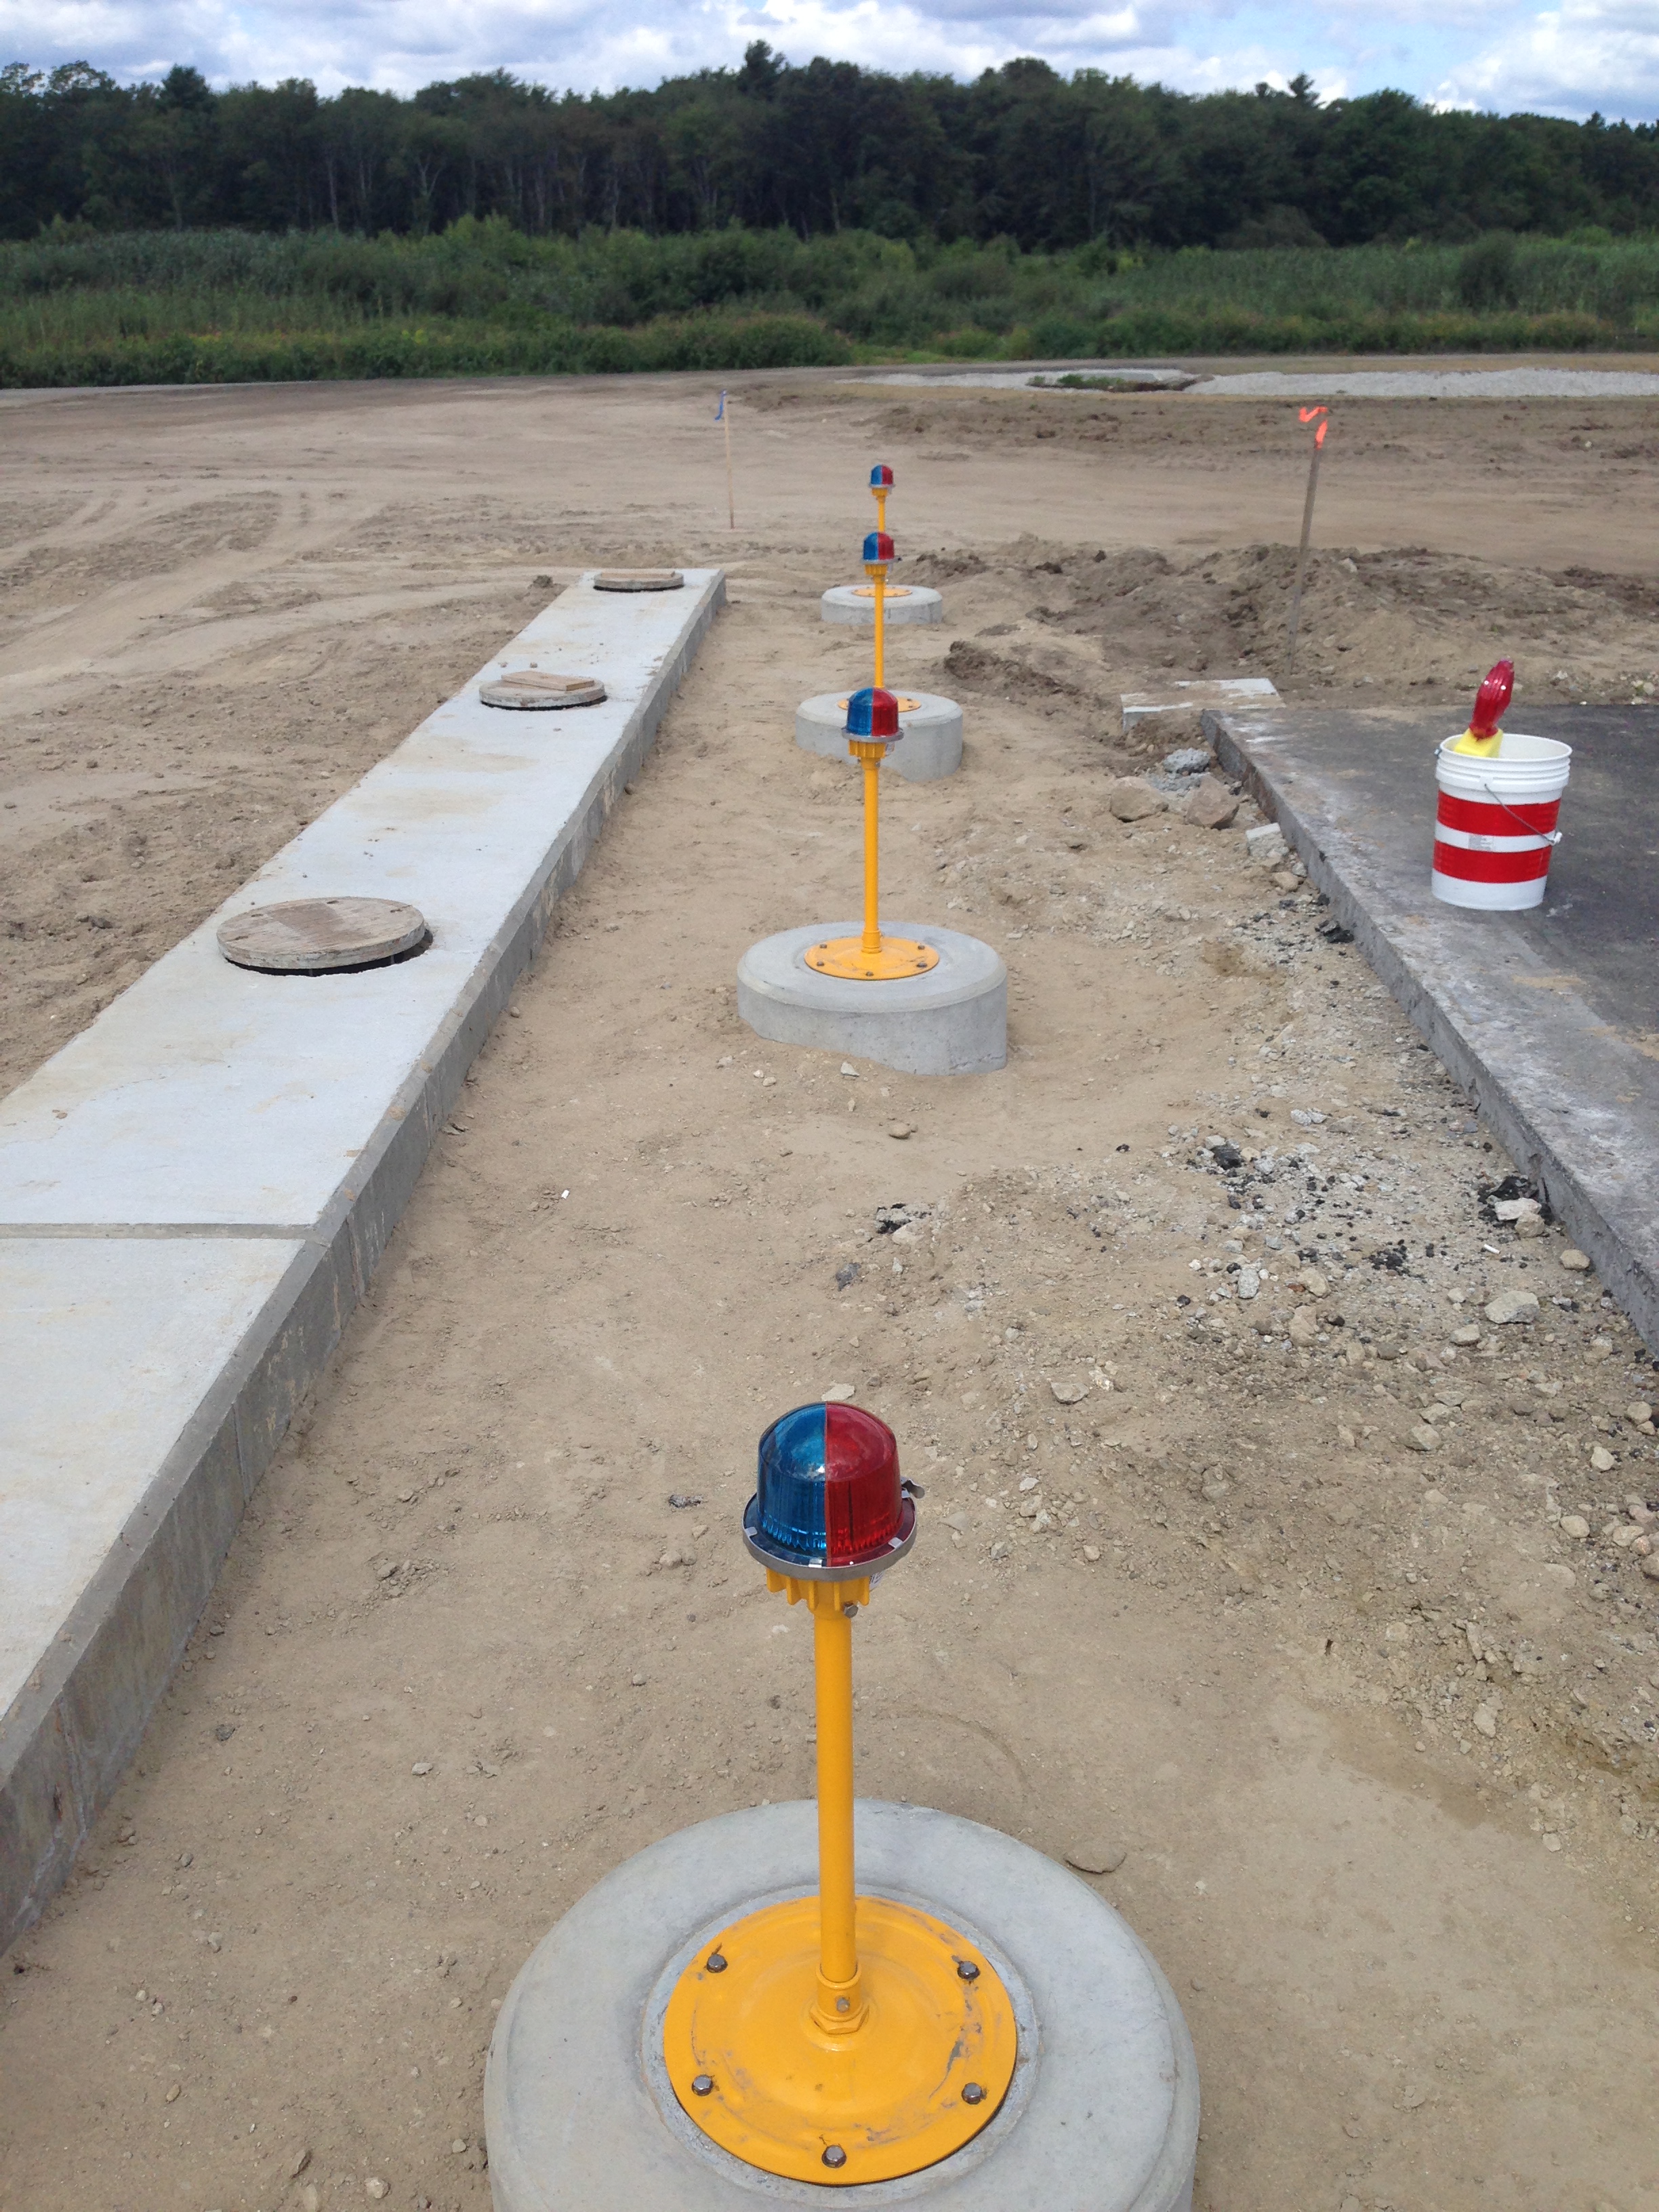
Threshold lights being installed on a runway end that does NOT have a displaced threshold.
In this case the globes are split half green and half red. As pilots arriving on the opposite end of the runway are notified that they are out of pavement by four red lights on either side fo the runway. Thus, a runway without a displaced threshold will have four lights on either side which have split globes with green on one side and red on the other, this in a simple form, shows the edge of the pavement, literally…
It’s a little different when a runway features a displayed threshold. In this case there will be four green lights on either side of the runway adjacent to the threshold bar painted on the runway, thus indicating where landings can be made. The first light will be in line with the runway edge lights with three additional lights extended outward. In this case the inner most threshold light will feature a split globe so that pilots using the other end of the runway will simply see a normal, white runway light. The other threshold lights further away form the runway on either side will features a “blacked out” side facing the opposite end of the runway.

A look at some displaced threshold lights.
This is where it can be even more tricky… In the case of a displaced threshold an aircraft departing on the runway needs to know where the edge of the pavement is before the displaced threshold so edge lights before the displaced threshold will be red. This indicates to pilots taking off where the edges of the runway are and pilots on approaches will know there is pavement there but it is not useable for them.
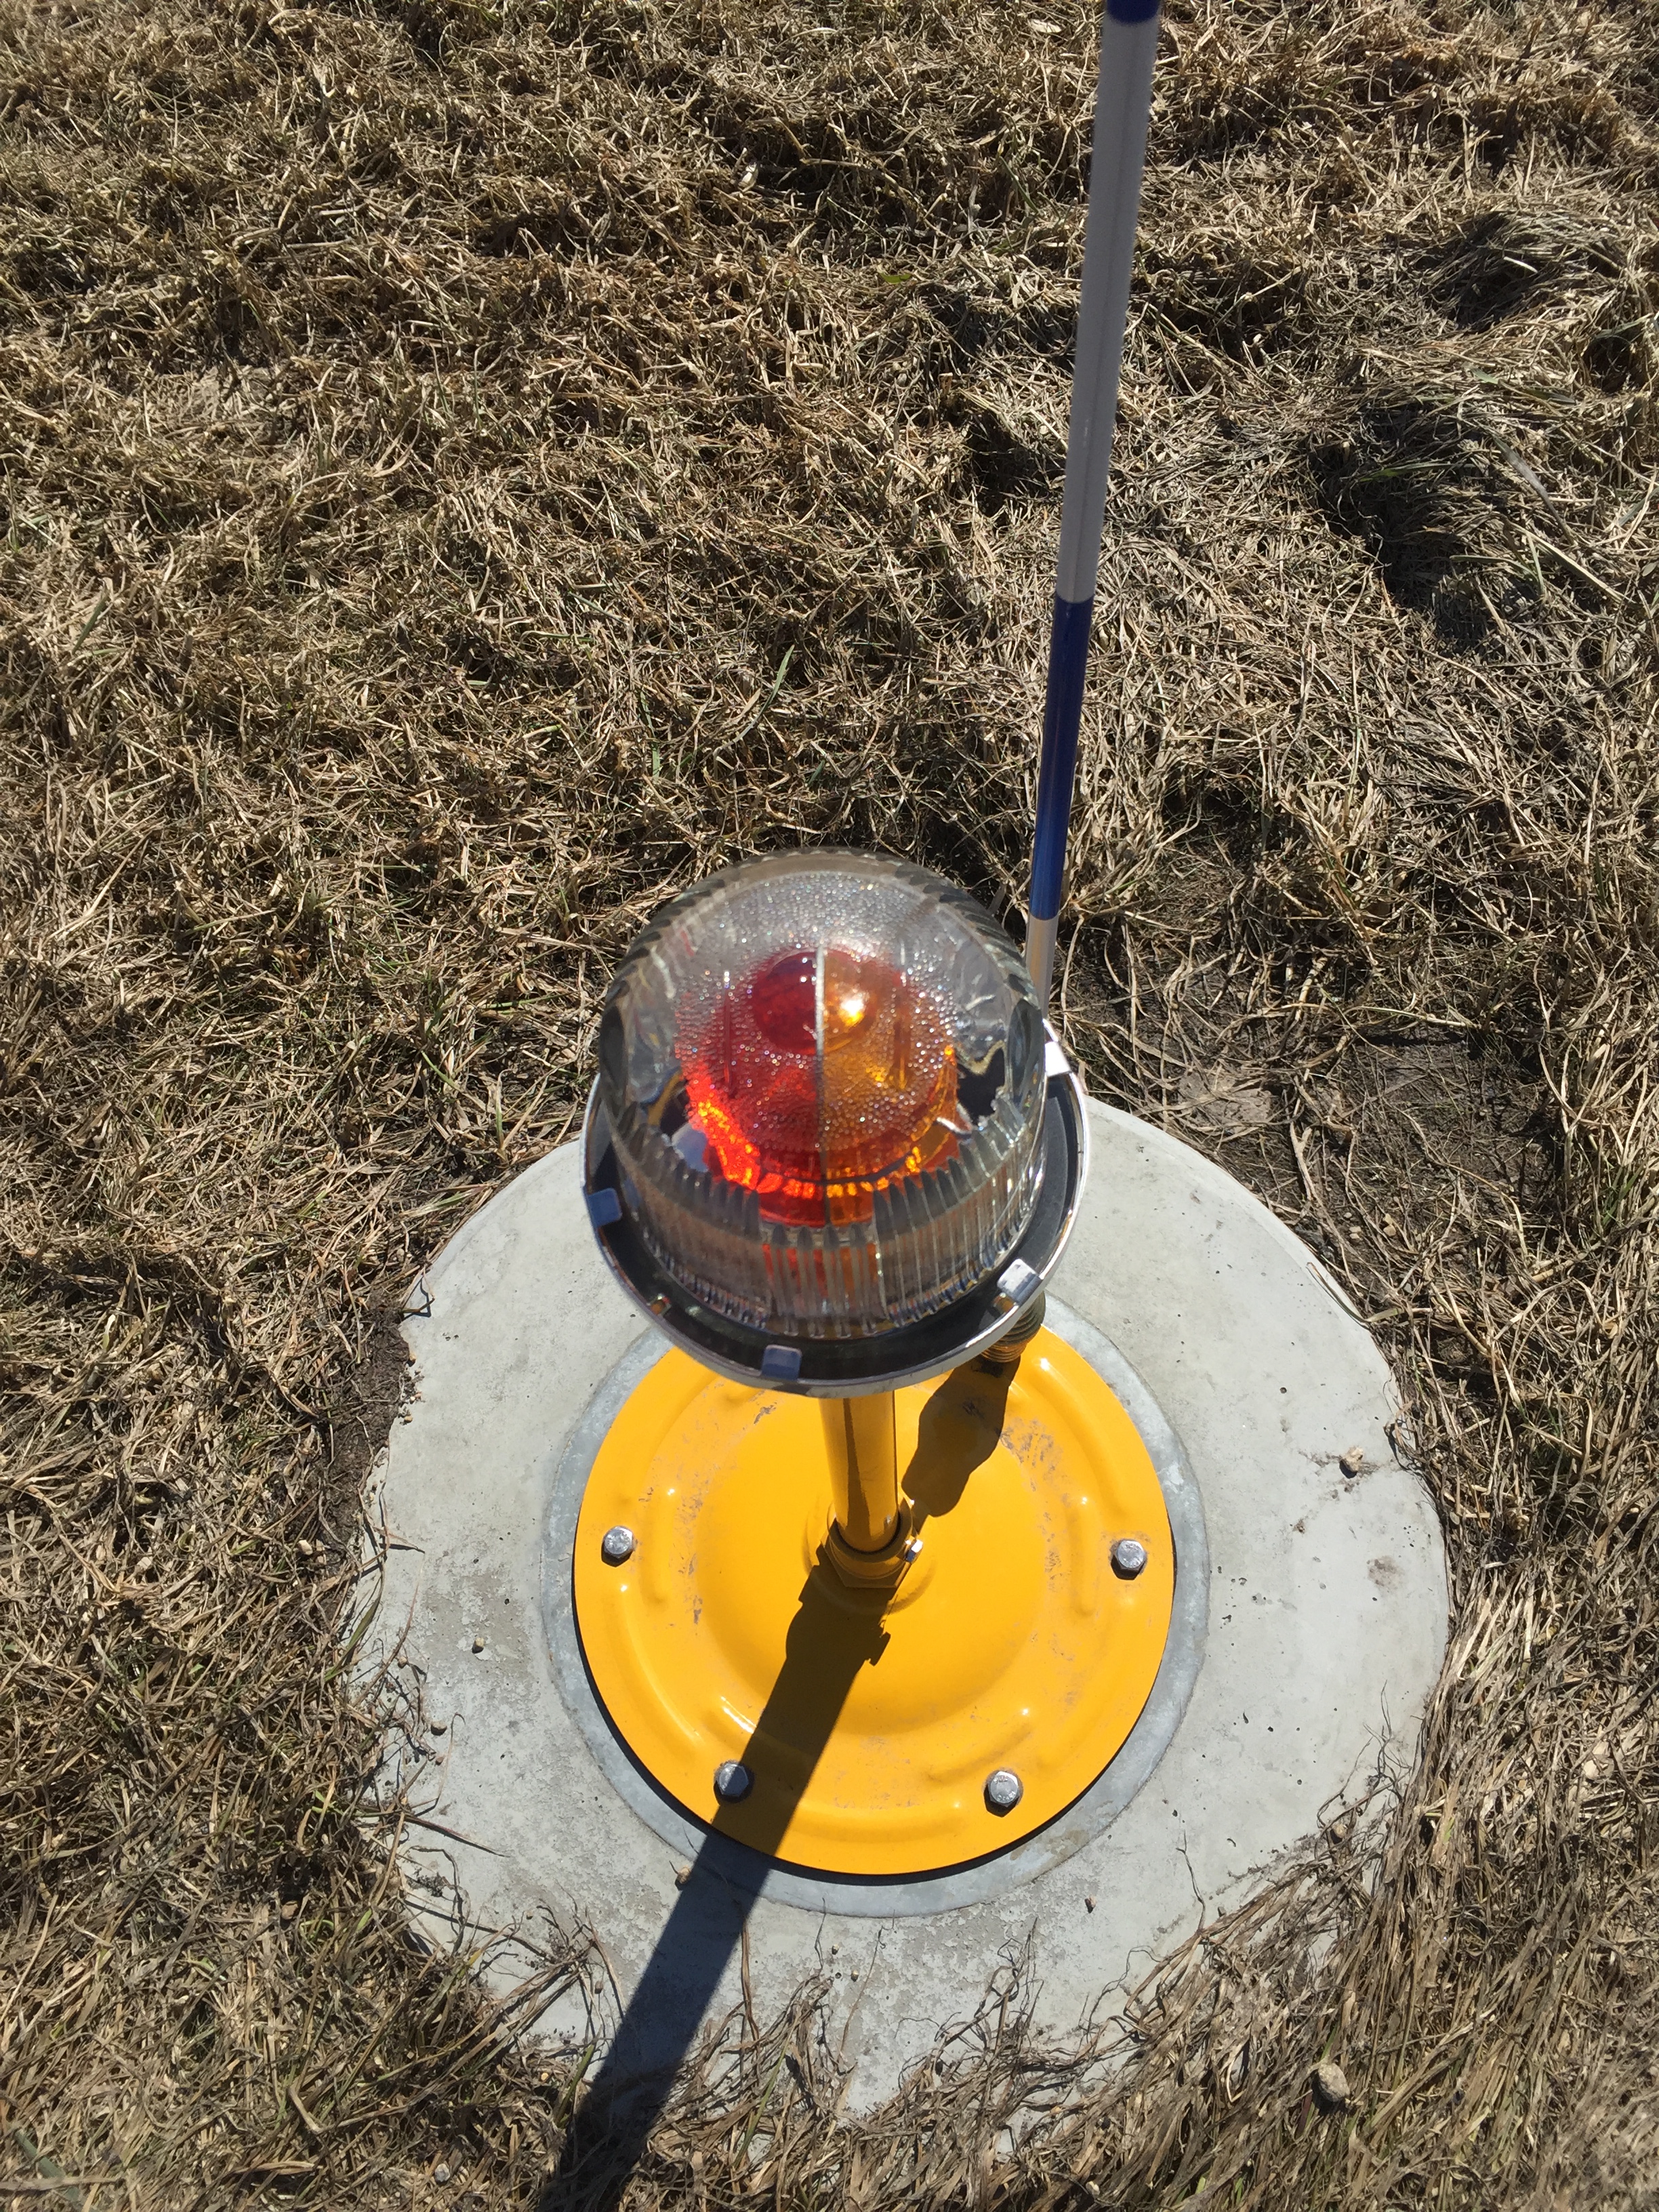
The red lens alerts pilots approaching to land that this portion of the runway is not usable for landing. At the same time these edge lights show pilots taking off where the pavement edges are… The amber signifies that the opposite end of the runway is served by an instrument approach procedures and this light is in the last half or 2,000′ of the runway, whichever is less.
So these lights will be split red and white or red and amber if the opposite end of the runway is served by an instrument approach… In this case the four lights across the end of the pavement will be all red as for approaching pilots they can see where the pavement begins but the red lights indicate do not land and for pilots using the opposite end of the runway these lights indicate the end of the pavement is quickly approaching so it’s probably a good idea to slow down at some point…
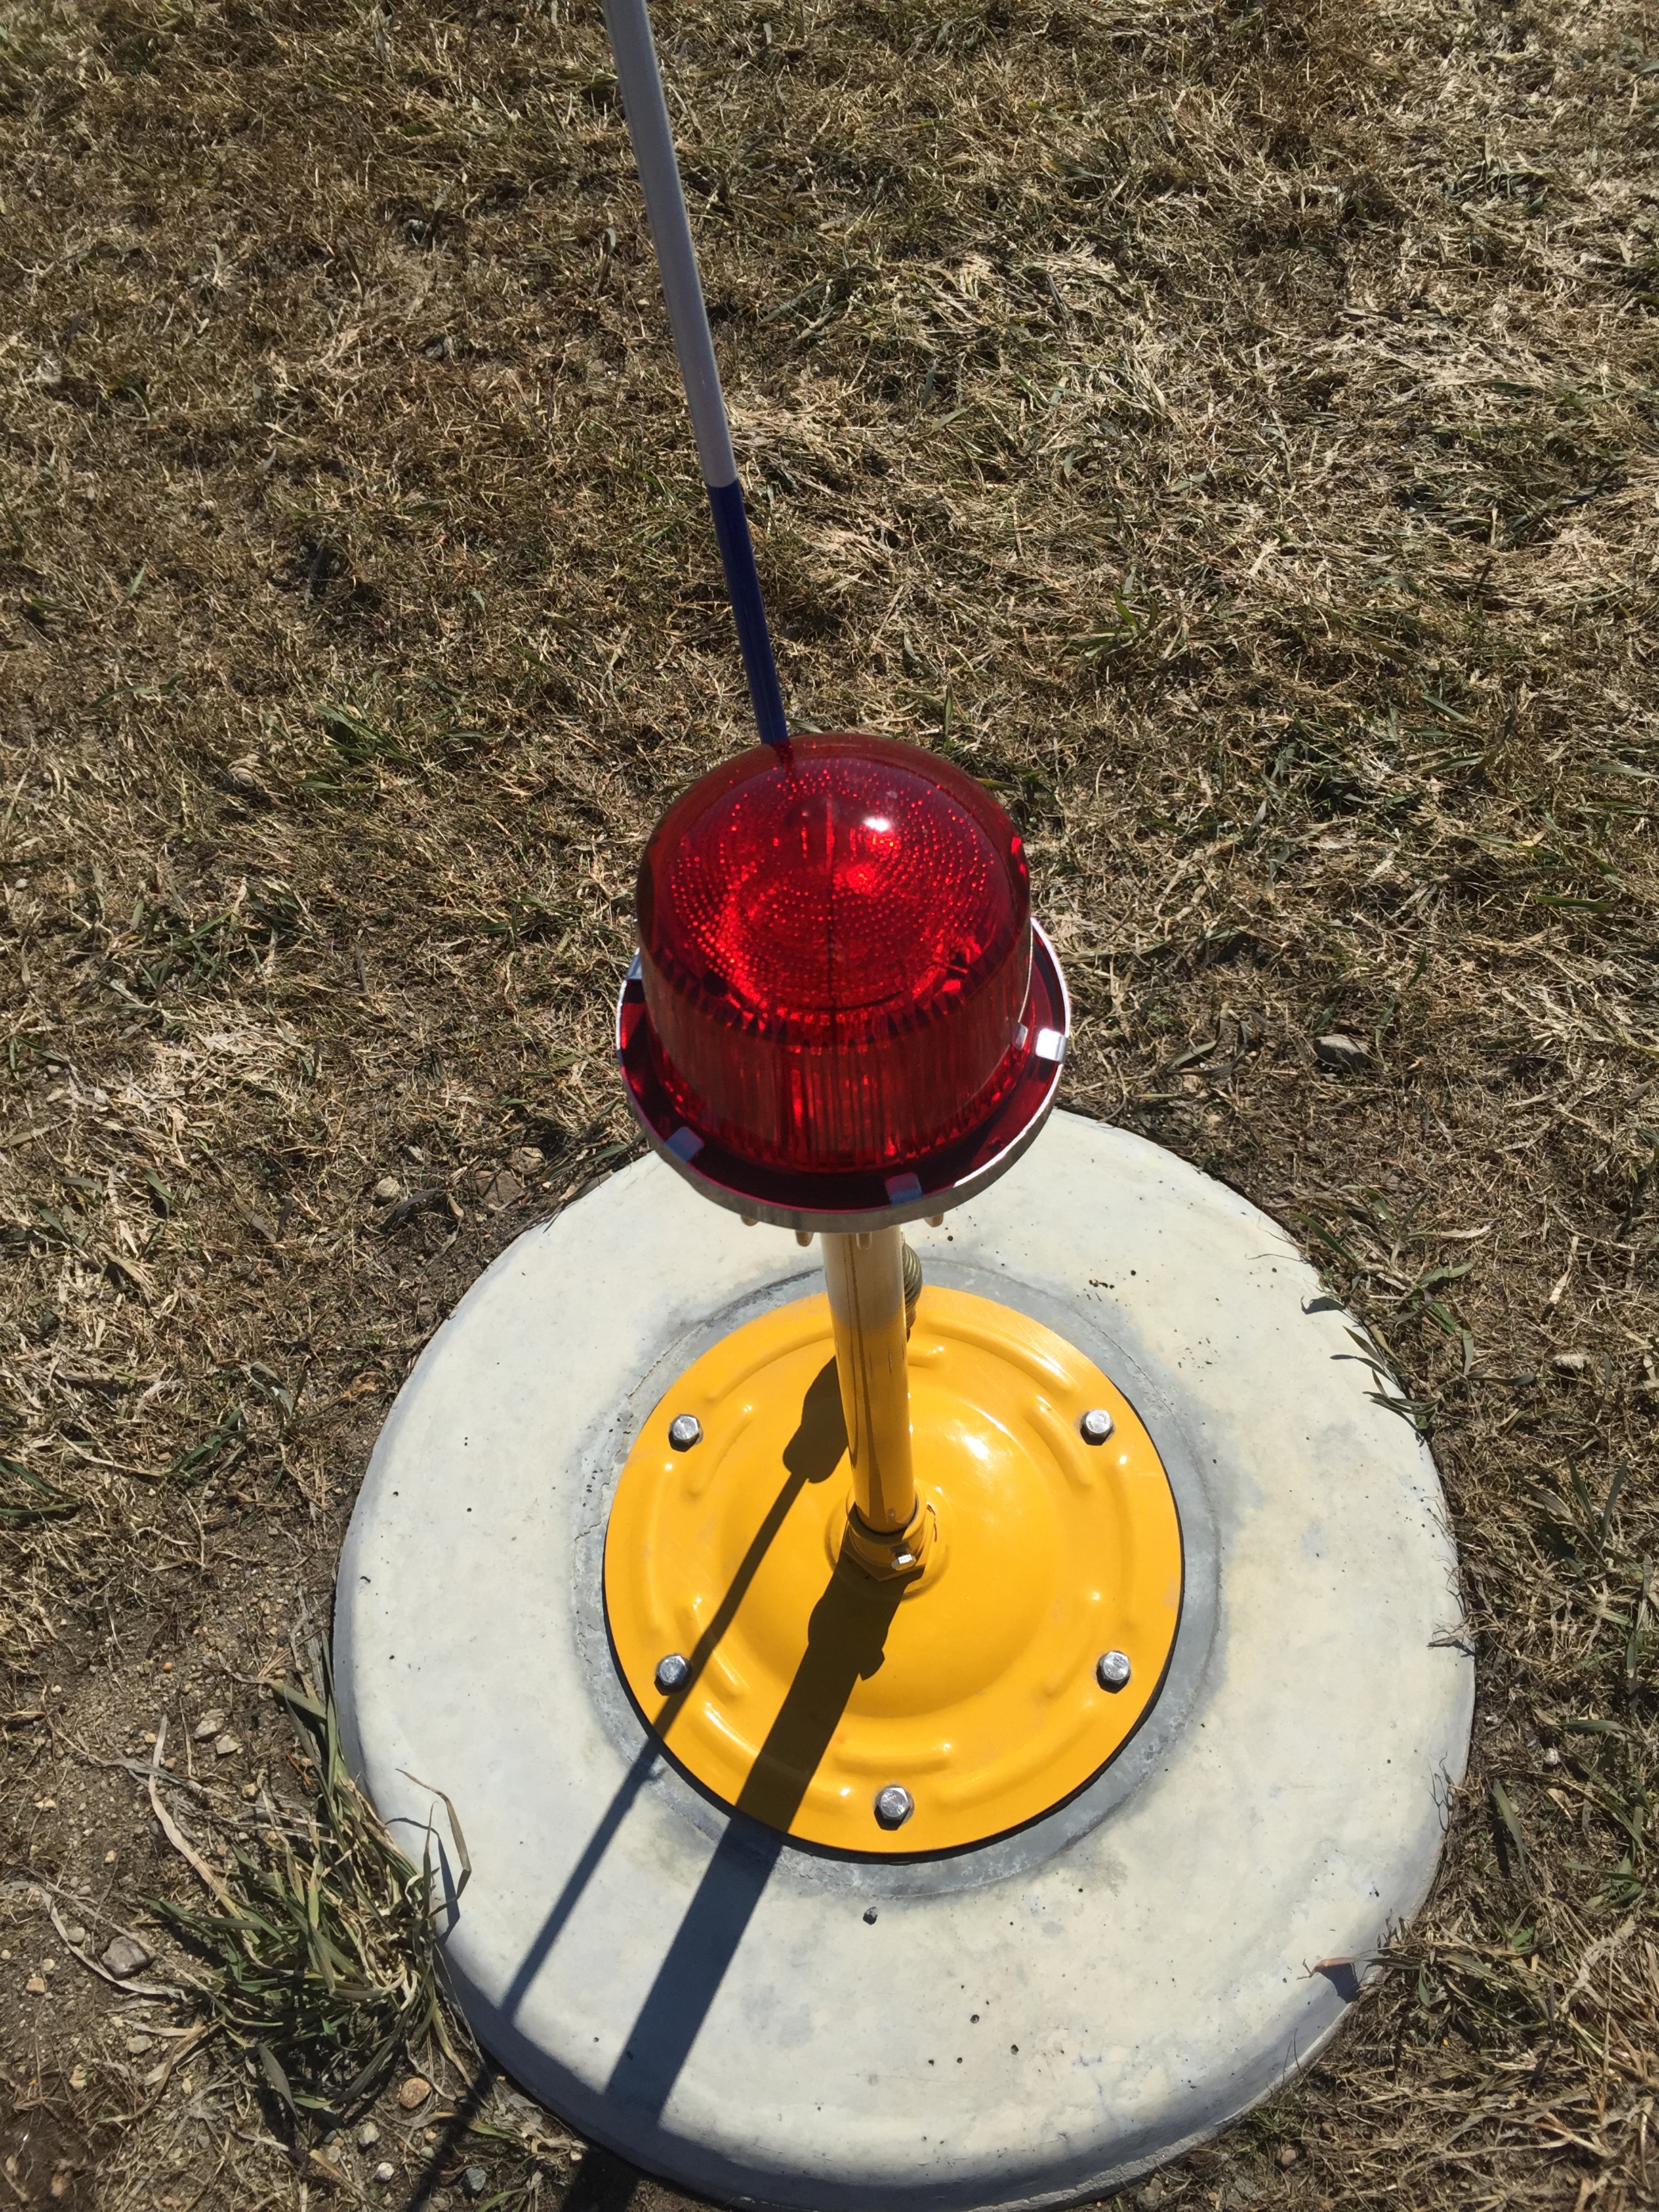
All red lights outline the end of a runway where a displaced threshold is located. One little known fact is that all red light can also be used to outline a “stopway” (yellow chevrons) which can support the weight of an aircraft, as opposed to an overrun, which is not designed to do so…
I bet you never thought about so many different edge light combinations? Huh… Neither did I until we did the acceptance walk through on the new Runway 5/23 at my home airport this past fall, following the reconstruction project for the runway and we had to cross check everything with the plans before we opened the runway and had the official walk through with the FAA Airport Division and MassDOT Aeronautics Division.
Edge lights are usually placed ten feet from the pavement edge to be consistent and always have a match, so if there is a light on one side of the pavement, there should (almost always) be a matching light on the opposite side of the pavement, whether it is on a runway or taxiway. Additionally, you may notice that if you exit a runway on a taxiway which intersects with another taxiway in a T-intersection, there are a bunch (varying on the width of the taxiway ending) of taxiway lights closely grouped together as an additional situational awareness aide to pilots that the taxiway you are currently located on is ending and you NEED to turn!
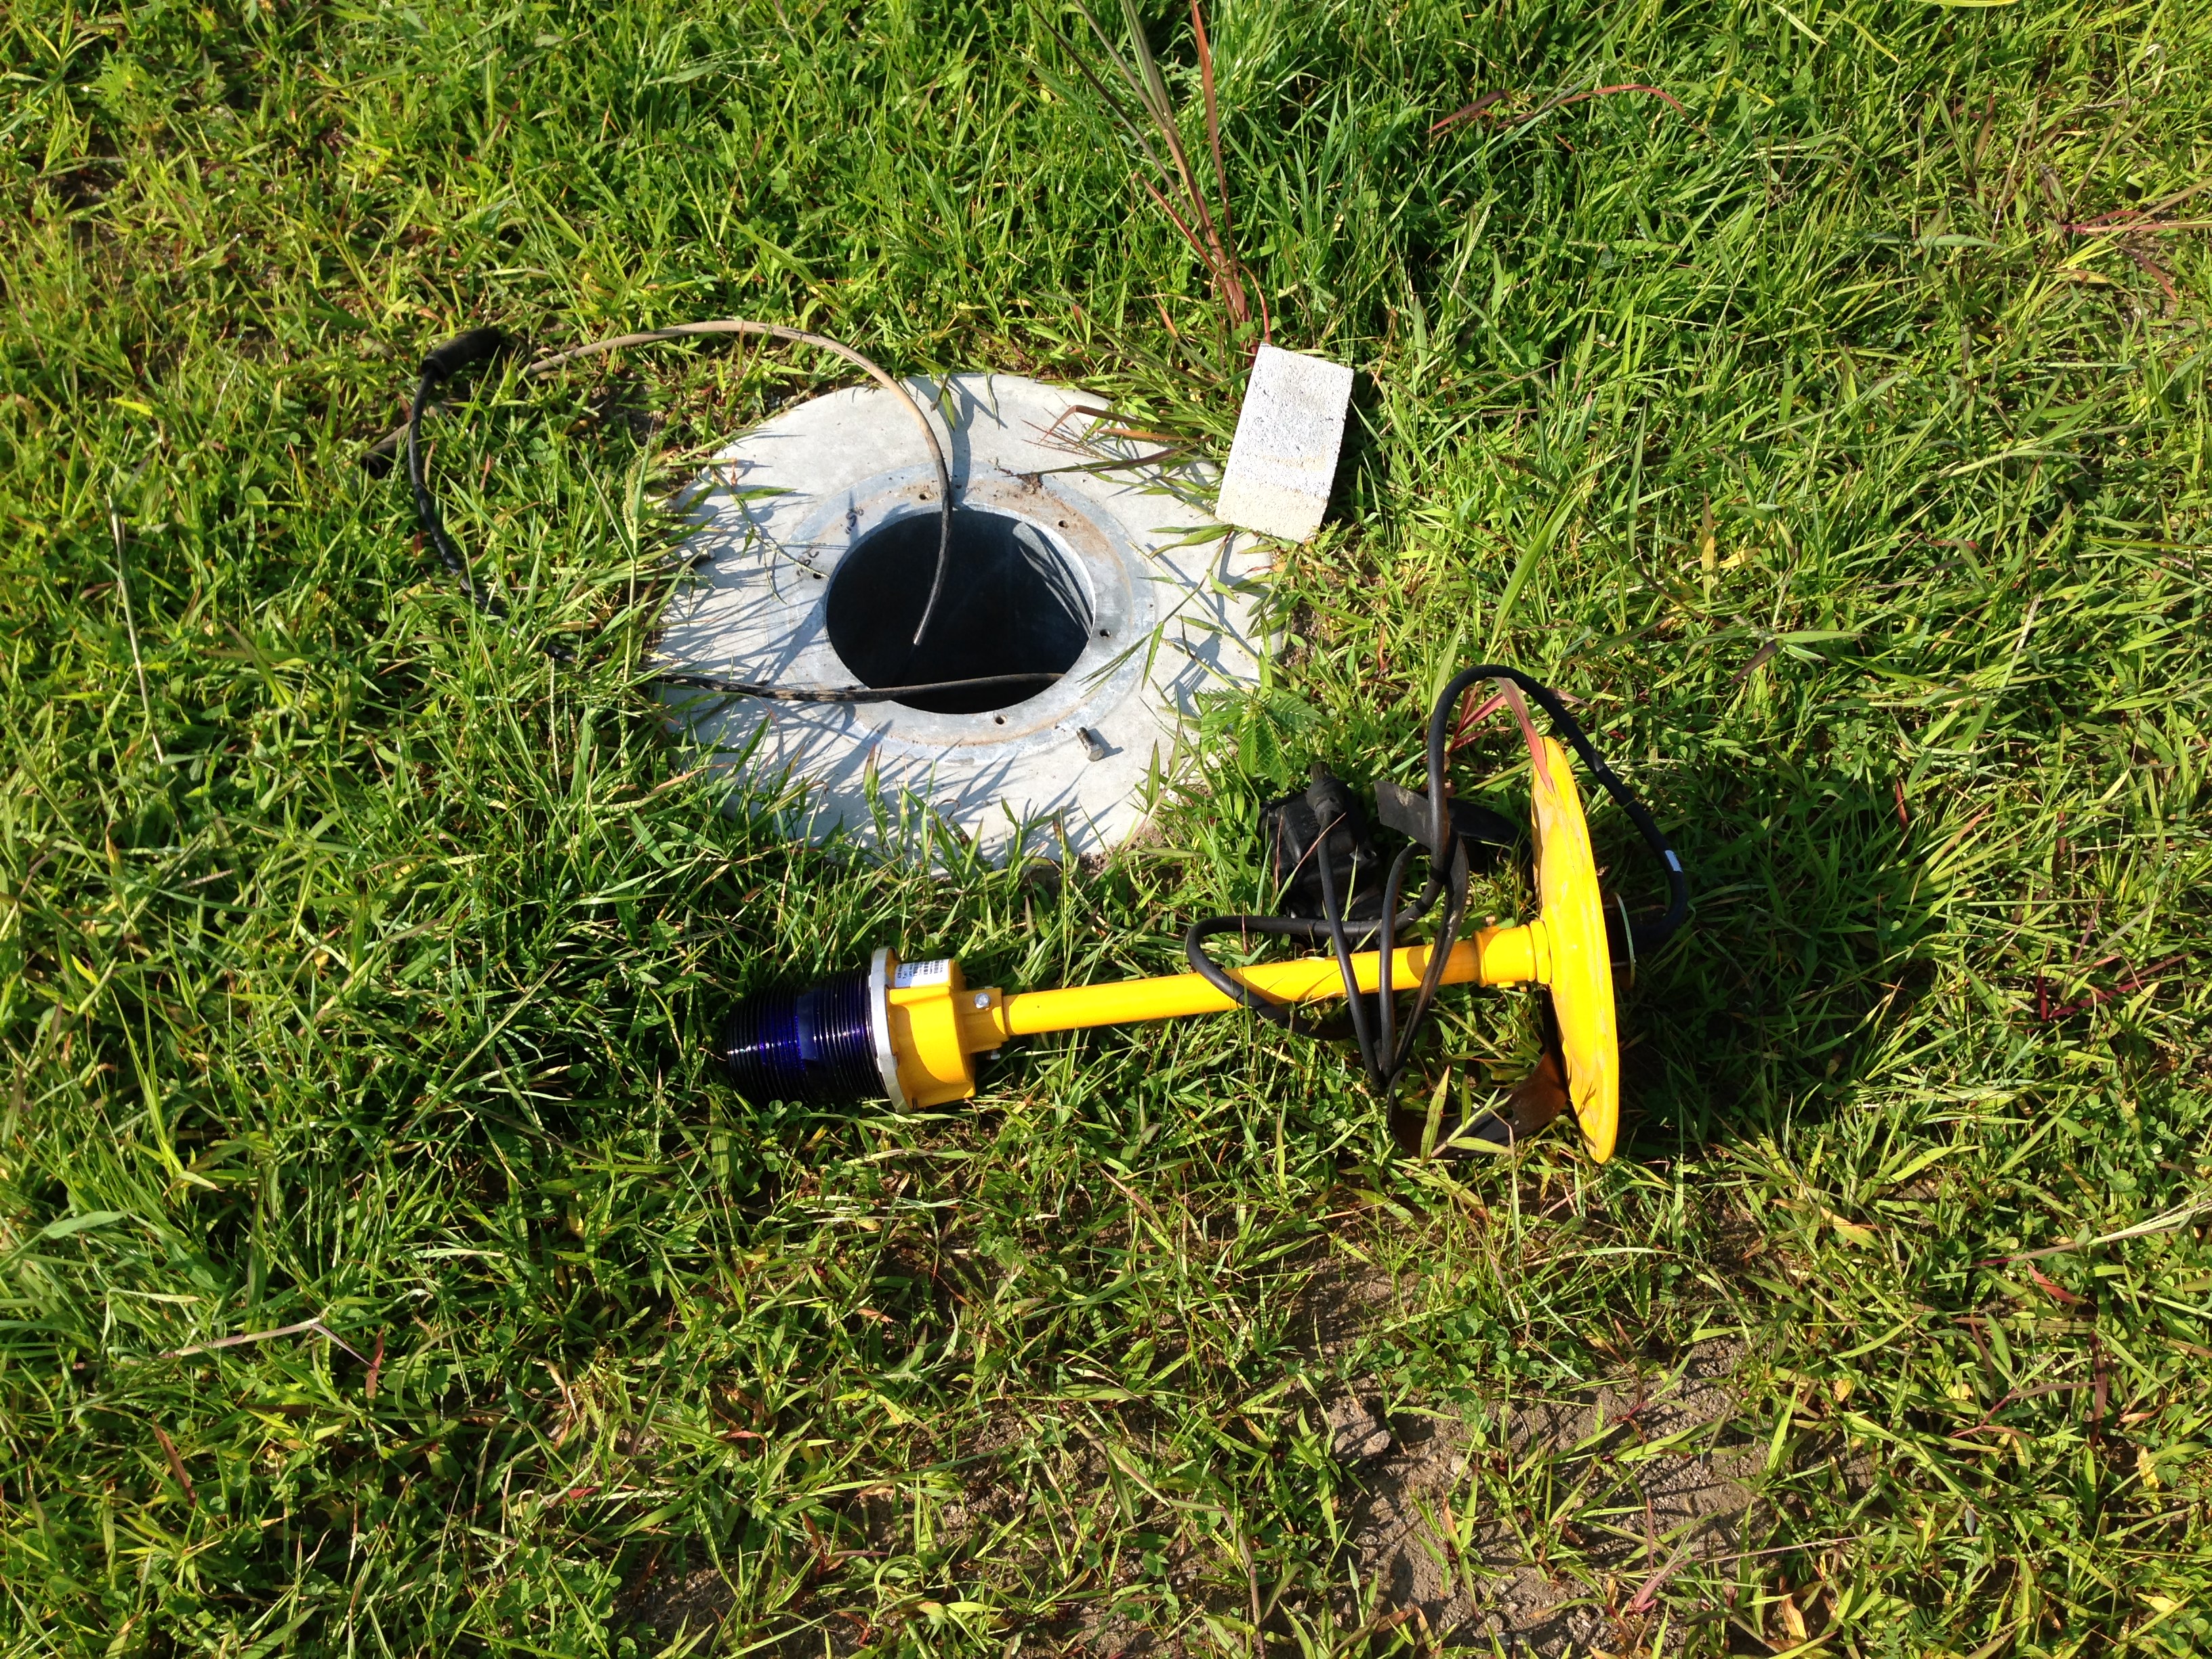
A taxiway light assembly just prior to being installed on a “can”…
Here is a little more on edge lighting… Edge lights are installed in one of two ways… Either mounted on top of “cans” essentially concrete cylinders or on top of steaks or poles that are buried in the ground. This is usually a matter of funding. Remember that lighting is a major item and usually part of an Improvement Project. Typically, these Capital Improvement Projects are funded 90% by the FAA, 5% by the state and the final 5% comes from a local share, in other words this is the cost out of the pocket of the airport. While this is a good value, it adds up quickly, especially if multiple projects are completed consecutively or over a short span.
Having edge lights mounted on “cans” is the preferable installation as the cabling will be protected inside the “cans” and between the cylinders inside of a casing. Whereas steak mounted lights have direct-bury cabling, meaning a trench is dug, the cable laid in, the steaks/lights installed and the trench and holes for each steak/post are back filled and seeded. Clearly, if the money exists, “cans” and conduit for the cabling and light bases is preferable, but the cost is exponentially higher. Typically when the lighting cable is direct-bury, very 5th or 6th light has a “can” base to it.

An in-pavement runway edge light, very close to a taxiway center line…
I almost forgot… There is one more type of edge light! Occasionally where a runway crosses another runway or a taxiway, the lights/spaces line up just right to where there would be an edge light that would be smack in the middle of the taxiway. Obviously you can’t have a light in the middle of a taxiway, or can you? Of course you can, these are “semi-flush” mounted in-pavement lights. These lights are designed so that vehicles and aircraft can go over them without incident, and they work just as well as the post mounted lights. When we had new in-pavement lights installed at EWB I was shocked (way beyond surprised) at how little of an impact there was when you ran it over with either a vehicle or an aircraft…
Edge lighting is capable of three levels of intensity, though some systems are limited to two levels. High, medium and low are the levels of lighting systems. These are commonly abbreviated as HIRL, MIRL, LIRL. The first letter stands for the intensity level and the remainder stands for “Intensity Runway Lighting.” If you check the Airport/Facilities Directory for your airport you can see which levels are available at your airport. Commonly HIRL or MIRL will be listed, the levels (of lower intensity) than the level listed in the AF/D are also available. In pilot controlled lighting environments, pilots can key the microphone on the proper frequency to change the intensity. 7 clicks for high, 5 clicks for medium and 3 clicks for low.
The voltage of the lights vary as well… Typically a HIRL equipped runway has 120 volt edge lights, with the threshold/end lights being 240 volts. A MIRL equipped runway has 45 volt edge lights and 120 volt threshold/end lights. A runway served by a LIRL system will feature 30 volt edge lights with 120 volt threshold/end lights. Typically taxiway lights are 30 volt. The current FAA Advisory Circulars on the subject do not actually call these voltages out anymore (previously various voltages were specified)…
One last thing… You may notice depending on where in the country you are the post height of the light varies. The post height can vary from only a few inches up to multiple feet in height… The idea is that airports that commonly receive a lot of snow have higher lights than airports that do not get as much snow so that the lights don’t get buried when the runways are plowed and the snow is pushed towards the lights. The other important consideration here is at night if you are landing without a landing light and the edge lights are elevated higher than you are used to, you may be prone to flare higher think that you are closer to the ground than you really are… Just something to keep in mind!
-Fly Safe, @MTElia1B9

Great article! Loved the images as well! 😉👏👏😀
Informative article! Use of infographic is awesome.keep posting and give useful information to us same as above.